Physical Address
304 North Cardinal St.
Dorchester Center, MA 02124
Physical Address
304 North Cardinal St.
Dorchester Center, MA 02124


Have you ever scrolled through Instagram and stopped dead in your tracks at the sight of a perfectly executed French braid? Same. There’s something about this classic hairstyle that just hits different – elegant, yet casual; sophisticated, yet totally wearable for everyday life. And yet, for many of us, the French braid remains an elusive unicorn of hairstyling that we admire from afar but never quite master ourselves.
Well, those days are over. As someone who spent countless hours in front of the mirror with aching arms and tangled hair, I can tell you that mastering the French braid is absolutely possible for anyone – yes, even you! Whether you’re a total beginner or just looking to level up your braiding game, this comprehensive guide will walk you through everything you need to know about French braids.
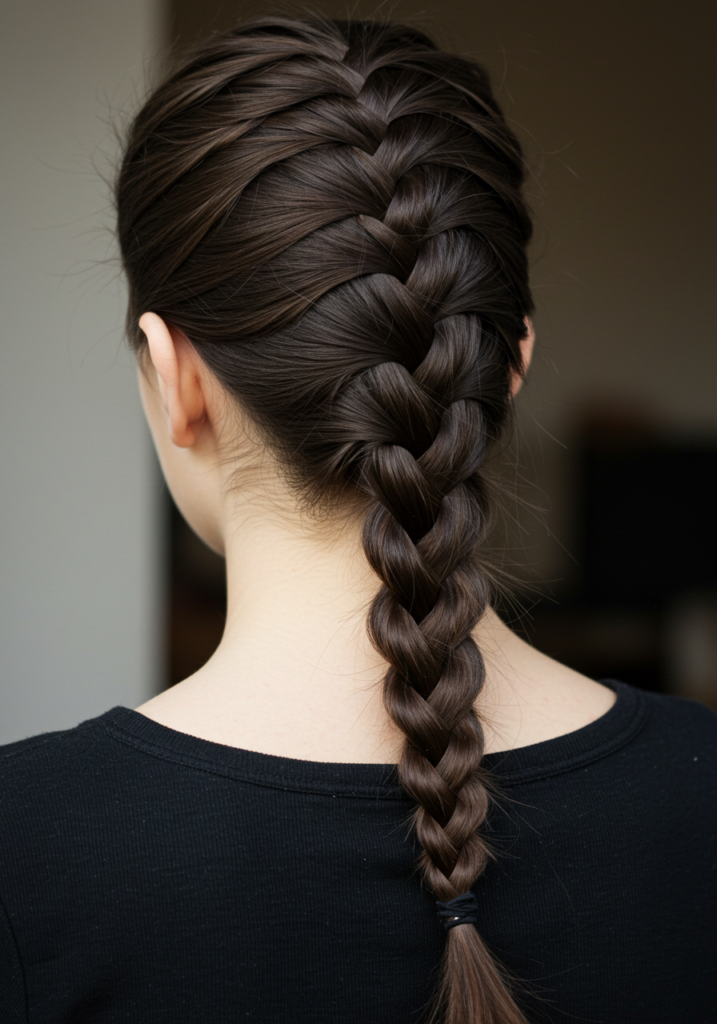
Before diving into the how-to, let’s talk about what makes a French braid special. Unlike a regular three-strand braid that sits on top of your hair, a French braid incorporates additional hair as you move down the head, creating that gorgeous, integrated look that hugs your scalp.
A regular braid (sometimes called an English braid) uses just three sections of hair that cross over each other from start to finish. The French braid, however, gradually adds hair from the sides as you move down, creating a braid that’s attached to the scalp. This technique not only looks more intricate but also provides better hold and can work as a protective style.
The French braid has been around for thousands of years (it wasn’t actually invented by the French, despite the name!) and has stood the test of time because it’s both functional and beautiful. It keeps hair secure, works for multiple hair types, and can transition seamlessly from gym sessions to formal events.
I remember my first attempts at French braiding – complete disasters that looked more like bird’s nests than the elegant styles I was hoping for. Don’t worry if yours looks the same! Practice really does make perfect with this technique.
Step 1: Prep Your Hair Start with detangled hair. I swear by the Wet Brush Original Detangler for this – it glides through knots without the painful tugging of regular brushes. For extra smoothness, a tiny dab of Bumble and Bumble Hairdresser’s Invisible Oil worked through the lengths can make braiding much easier.
Step 2: Section Your Hair At the crown of your head, take a small triangle-shaped section of hair. The smaller this section, the more refined your braid will look.
Step 3: Divide and Begin Split this section into three equal parts. Just like a regular braid, you’ll cross the right strand over the middle, then the left strand over the middle.
Step 4: Start Adding Hair Here’s where the magic happens! Before you cross the right section over the middle again, add a small amount of loose hair from the right side of your head to it. Then cross this newly thickened right section over the middle.
Step 5: Continue the Pattern Do the same on the left side – add a bit of loose hair to the left section before crossing it over the middle. Continue this pattern all the way down, adding hair with each cross-over.
Step 6: Finish It Off Once you’ve incorporated all your hair, finish with a regular three-strand braid to the ends. Secure with a Scünci No-Slip Grip Evolution Hair Tie for hold that won’t damage your hair.
I’m not going to lie – there’s definitely a learning curve. The coordination required to hold three sections while simultaneously adding hair takes practice. But I promise it’s not impossible! Most people can get the hang of it after 3-5 dedicated practice sessions. Try practicing in front of your favorite TV show to make the time fly by.
Absolutely! As long as your hair is at least 3-4 inches long, you can create a French braid. For shorter styles, try a partial French braid that transitions into a tiny ponytail, or do multiple smaller braids instead of one large one. The Diane Rat Tail Comb is perfect for creating clean sections on shorter styles.
One of the best things about French braids is their staying power. A well-executed French braid can easily last 2-3 days. For maximum longevity, finish with a light mist of TRESemmé Extra Hold Hair Spray or L’Oréal Paris Elnett Satin Extra Strong Hold Hairspray. And yes, you can absolutely sleep in a French braid – in fact, it’s one of the best protective styles for preventing nighttime tangling.
This depends on your hair type:
The secret to a tight French braid is tension. Keep the sections pulled taut as you work, and don’t be afraid to really pull them snug against your scalp. Adding a tiny bit of Verb Ghost Oil to your fingertips can help you maintain grip without creating frizz.
When done properly, French braids are actually protective styles that can prevent damage! However, if braided too tightly or left in for too long (more than 4-5 days), they can cause tension at the roots. Listen to your scalp – if it feels uncomfortable, your braid is too tight.
The beauty of French braids is that they work for virtually all hair types, but the technique might vary slightly:
For Fine Hair: French braids can actually make fine hair look fuller! The key is to create “pancaked” braids by gently pulling on the edges of each section after you’ve finished braiding. A light spritz of Kristin Ess Soft Shine Beach Wave Spray beforehand adds crucial texture.
For Thick Hair: Lucky you – your braids will look naturally full! Divide your hair into multiple sections and braid each separately for more manageable handling. Keep a spray bottle of water nearby to dampen sections as you work.
For Curly Hair: Embrace your texture! French braids on curly hair create gorgeous dimension. Use the Revlon Tangle-Free Hair Picks to gently detangle each section before incorporating it into your braid. A bit of Kerastase Elixir Ultime Hair Oil Serum can help smooth frizz without eliminating your natural pattern.
The “pancaking” technique is your best friend here. After completing your braid, gently tug outward on each crossing section to widen it. For extra volume, try braiding with slightly dirty hair or apply a volumizing dry shampoo like Amika Perk Up Dry Shampoo before you start.
Once you’ve mastered the basic French braid, a whole world of variations awaits! Here are some of my favorites:
This creates an “inside-out” effect where the braid sits on top of your hair instead of being tucked in. The technique is the same as a French braid, except you cross sections under the middle strand instead of over.
Perfect for an asymmetrical look, this starts at your temple and continues diagonally down. It’s particularly flattering if you have face-framing layers or want to show off statement earrings.
Create two French braids, one on each side of your head, and wrap them around to meet at the back. Secure with Invisibobble Original Traceless Hair Rings for a hold that won’t leave creases.
Start with a French braid at the crown of your head and transition into a regular ponytail halfway down. This hybrid style works beautifully for workouts or formal events alike.

Even experienced braiders run into issues sometimes. Here are solutions to common problems:
Problem: Braid is too loose and falls apart Solution: Make sure you’re adding small sections at a time and pulling tightly after each crossover. Using a light styling product like Moroccanoil Treatment Light can add grip.
Problem: Hair keeps slipping out of your hands Solution: Try braiding with slightly dirty hair, or add Bumble and Bumble Hairdresser’s Invisible Oil for better control without stickiness.
Problem: Arms get tired halfway through Solution: Position yourself with your elbows resting on a table or countertop for support. Practice will also build up your “braiding endurance” over time!
Problem: Can’t see what you’re doing Solution: Practice using two mirrors (one in front, one behind) or record yourself braiding to better understand your technique.
French braids aren’t just for casual days – they can be dressed up for special events too:
French braids are truly one of the most versatile hairstyles out there. They can be casual or elegant, simple or complex, and they work for almost all hair types and occasions. The learning curve might feel steep at first, but I promise the payoff is worth it!
Remember, practice makes perfect. Don’t get discouraged if your first few attempts look nothing like the Instagram braids that inspired you. Even the most skilled braiders started somewhere!
So grab your Wet Brush, section off that hair, and start crossing those strands. Before long, you’ll be the friend everyone comes to for braiding help before special events. And there’s no better feeling than that!

Have you mastered the French braid yet? Share your tips or struggles in the comments below!
Meta description (155 characters): Master the timeless French braid with our step-by-step guide. Learn techniques for all hair types, troubleshooting tips, and must-have products for perfect braids.
